Hello!
This is my portfolio submission for the Game Development – Programming course at Red River College. Code examples are linked throughout.
Example 1 – Driving Values in Unity
Working with animation assets is frustrating. You need to use the clunky animation UI in Unity, manage an ever-growing collection of animation assets, and go back and forth adjusting multiple animations when you want them to look good together. Transform animations also don’t play well with physics, and if you want varied animations, you actually need to make a new asset for each variation (For my purposes here I’m going to ignore fancier animation tech like blend trees, animation overrides, etc.).
In anticipation of the Ludum Dare 48 gamejam, I had been watching an assortment of programming and gamedev videos for inspiration. One in particular really got me thinking about ways to use numbers in the range [0, 1]. Now, I had some familiarity with the concept of drivers as they exist in Blender, so I thought that implementing a similar system in Unity might be a nice way to avoid working with static animations.
Here is the sort of control that I wanted, ideally in a generalised way that could be applied to moving platforms, flickering lights, and doors, among other things:
In a nutshell, my idea was to create a class which exposes a single value, generally (but not necessarily) within the range [0, 1], which other objects could use as a control value for their own behaviour. Since I was developing the system for a jam, I figured that a Driver system would allow me to implement a larger number of behaviours with more variation than I would be able to with a standard animation-asset approach.
Although I was partially correct, the jam timelines were just too tight for me to get everything going the way I had envisioned. In the frenzied rush of the jam I made a bad design decision for how to structure the Driver system. I chose to create Drivers and Driveables, where Drivers would store a list of all Driveables that they should influence, and propagate their control value to all Driveables every frame. Technically this works, but it’s kind of awkward that Drivers are also managing other objects. In addition, there was no mechanism to allow a Driveable to be influenced by more than one Driver, as each Driver would overwrite the value.
I realised my error the next day, but there wasn’t enough time to refactor, so I had to make it work. With only enough time to add a TimeDriver, which loops back-and-forth between 0 and 1 with a specific time duration (essentially a triangle wave, but an added an easing function can bring it closer to a sin wave). I ended up using it to control moving platforms and swinging obstacles, where they oscillate between a start position and an end position as shown below:
After the jam ended, I refactored the code, scrapping Driveables altogether in favour of the idea that a Driver should not care who is using the drive value and instead just publish events for any other class to subscribe to, and let the subscribers decide how to interpret the data (this also opens the door for them to add their own processing or smoothing to the drive values). Here’s a link to the new Driver class. It’s a little bit lengthy, but the key idea is that it manages all the event publishing and range checking of the drive value, while concrete derived Drivers need only specify how to calculate that drive value in the method CalculateDriverValue().
Hooray! Adding new types of Drivers is actually fairless painless now (I have implemented a few so far such as the very simple RandomDriver and the slightly-more-complex NoiseDriver and TimeDriver). I have also begun working on a CompositeDriver, which takes input from one or more other Drivers and uses that to drive its own value (right now only a weighted average is up and running, but I’d like to also add optional multiplicative influence to each Driver in the composite).
Here are 3 different flickering Driver animations that I was able to set up quite quickly in the editor:
And next is my favourite example so far. Using a ProximityDriver on each of these cubes allows them to react as the player moves around the space (Here is my script for animating the materials. It listens for changes to a Driver and then uses that value to modulate the emission strength):
So, there are certainly a lot of improvements that could be made to this system (like improving the inspector interface, possibly implementing as a C# object rather than monobehaviour, etc.), but overall, I think it offers a really flexible way to quickly create interesting, context-sensitive animations/behaviours with minimal additional code. The ProximityDriver for instance has all sorts of applications. The first one that comes to mind is using it to control the camera follow smoothing such that it will move lazily while the player is nearby and gradually accelerate to keep up as he or she moves away. Other uses could include objects which exert a distance-reliant force on the player, or to move obstacles out of the way as another object approaches them.
By the way, you can try the jam version of this game here.
Example 2 – Spatial Audio with Unity and Max/MSP
A few years ago, as a music composition student, I was interested in using Unity to create interactive visuals for musical performances. I had already spent some time working with the visual scripting tool Max and thought it might be cool to learn how to combine the two. My research led me to UnityOSC, a project which allows you to send and receive OpenSoundControl (OSC) messages from Unity. OSC messages allow you to send messages between different programs.
Armed with UnityOSC, I set out trying to create a basic system for imitating spatial audio. Since Max is designed specifically for processing audio, my plan was to do all audio processing in Max and send control data from Unity in real time. So, using the assumption that all sounds have a source, I designated certain objects in the scene as sound sources and the camera position as the position of the listener’s ears. Each frame the listener position is sent via OSC to Max where each sound source (which I named VirtualSounds in Max) will pan its audio according to the angle between the listener’s forward vector and the line between listener and sound source. The amplitude of the sound source is also modified according to distance from the listener, and a low pass filter is applied as distance increases to mimic real-world high frequency attenuation.
Here is a demo of the system in action (unfortunately the volume is quite low):
You may have also heard the audio occlusion effect around the 1:00 mark. This is done by casting a ray from the sound source towards the camera and, if it is obstructed, sending a message to Max to apply a low pass filter to the sound according to how occluded the sound source is. This doesn’t account for bounced/indirect sound, but it still sounds pretty convincing. Here is a snippet of the occlusion code.
Shortly after creating that spatial audio demo, I decided to switch my focus to creating an interactive demo for my graduation recital. By sending OSC messages to Unity from my audio software (Ableton Live in this case), I can trigger different behaviours. Music software uses MIDI data to express musical information like pitch and velocity (loudness). A “note on” message consists of one integer which represents the pitch (where 60 = C, 59 = B, 61 = C#, etc.), and another integer which represents the velocity. A velocity value of 0 is interpreted as a “note off” message. So, in the demo video linked below, each note in the marimba and bass synthesizer is sent to Unity as a note on message, and when it ends, as a note off message. Using the classes AdsrEnvelope and AdsrBehaviour, which I designed to function like ADSR envelopes, received “note on” messages can be used to call Trigger() in the AdsrBehaviour which will then move a value through the attack, decay, and release times (sustain is an amplitude level, not a time interval). If the behaviour should be cut short when a “note off” is received, Toggle(false) can be called on the AdsrBehaviour to immediately jump to the release phase of the envelope. AdsrBehaviours are used on the glowing rocks and the beams of light in the distance.
The camera is using a Cinemachine dolly track, and it’s position along that track is dictated by an automated parameter in my music software, meaning that the camera position could be controlled by any value in the music software (such as amplitude of a digital signal, a hard-coded curve automation, or in my case, a hardware fader).
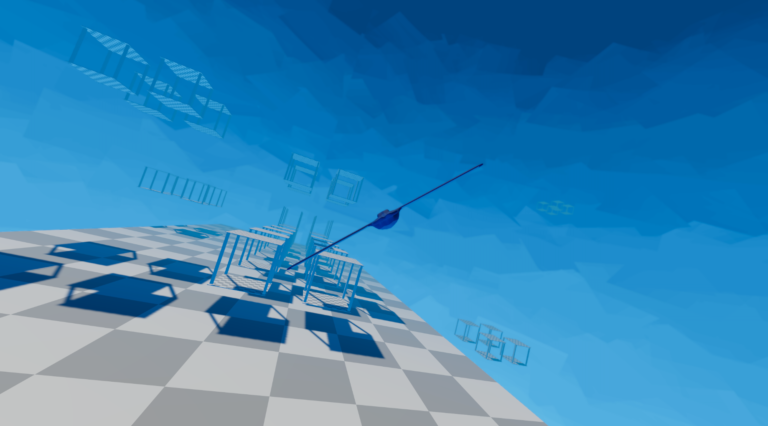
Example 3 – Flying Character Controller
I worked on this project sometime around mid to late 2020. I had tried to do player flight in the past, but was never really satisfied with the results. Moving with forces always felt floaty and unsatisfying. So for this attempt, I tried to do a little bit more research on the mechanics of flight first. Although I didn’t understand many of the formulae enough to implement physically accurate flight, I was able use simplified lift, gravity, thrust, and drag forces to make a flight controller that works well and is fun to use, even if it’s not really realistic. I had experimented with braking and diving acceleration, but they were still buggy so I took them out for this demo.
You can try the game on Itch here.
The flight controller is split up into a few classes to help me stay organized. The FlightController script is a MonoBehaviour which is mostly just responsible for getting player input, then telling the FlightManager to update its data, and calculate/apply physics (For clarity, I removed a large part of the FlightController like initialization, and event registration). The FlightManager is provided with an IFlightSpecifications which dictates the flying properties of an object such as speed, turn rate, and acceleration.
Example 4 – Melody Generation in Unity
For Ludum Dare 47, I wanted to try out some ideas for creating a generative music system. My objective was to create a small, modular set of rules which could be combined to create interesting musical results. There could be any number of musical rules, but here are a few I had in mind:
Unfortunately, due to time constraints, I was not able to implement all of those, so I focused on developing a system for stochastically choosing rhythm and pitch. By creating collections of acceptable pitches and note durations, I could assign a weight to each element and then use probability to select a pitch and duration for each note to be played. For prototyping, my teammates set up a soundbank using the audio middleware FMOD, which allowed me to generate a note, and then send the desired pitch to FMOD.
To begin, I set up a Metronome which sends regular ticks according to the desired tempo (named bpm for “beats per minute” in the script). When the MelodyGenerator is enabled, it generates a note and plays it on the next received metronome tick. Each note also contains a duration, and this duration defines how many ticks the MelodyGenerator will wait before playing another note. I should point out for clarity that my use of the term bpm for the tempo is misleading. Traditionally, one can subdivide the ticks of a metronome to play faster rhythms than the pulse of the metronome. However, since MelodyGenerator is not keeping track of time itself, but rather the ticks it receives, these ticks should be thought of as the shortest possible note duration. This could be partially solved by introducing a time signature, where certain ticks would be designated as downbeats (and therefore non-downbeats would be considered subdivisions), but since it is mainly a convenience to do so, it seemed unneccessary to add this in the prototyping phase.
Getting back on track, pitches and durations were calculated based on MelodicProbabilties. As a ScriptableObject, it can be created as data and then referenced by MelodyGenerator. The logic is the same for pitches and durations, so I will only explain for pitches. To set up a pitch collection, the user assigns values to List<WeightedInt> pitches. Every time an element in MelodicProbabilities is changed, Unity triggers the OnValidate() callback. In OnValidate() the method CalculateCumulativeWeights is called, which returns the total weight of all pitches in the list, then populates and sorts the private List pitchesCumulative. The difference between pitches and pitchesCumulative is that the weight of each element in pitchesCumulative is the sum of all previous element weights in pitches and its own (so list [(a, 2), (b,1)] would become [(a, 2), b(3)], etc.). With these values stored, MelodicProbabilities is ready to handle MelodyGenerator’s requests for new notes.
When MelodicProbabilities’ GenerateNote() method is called, it uses the SelectWeightedRandom() method to choose the next value. By using the total weight of all pitches and the list pitchesCumulative (sorted by weight) which we stored earlier, we can perform a binary search on pitchesCumulative (the weights, not the values), where the searched index is a random value between 0 and totalWeight. Since the weight of each element in the sorted list pitchesCumulative will be greater than the previous one (unless it had a weight of zero), we can think of the weight difference between element i and element i-1 as element i’s “slice of the pie” where the pie is the totalWeight. If there is no weight value equal to the random value we searched for, we can take the bitwise complement of the value returned by binarySearch to obtain the index of the next element larger than the searched value.
Here is a demo of weighted pitch and rhythm generation. The pitch set used is a pentatonic scale, which was chosen arbitrarily, but a more interesting pitch collection could always be used instead. That said, even with just these two simple rules governing preferred pitches and durations, a surprising amount of variation can be achieved (particularly with the durations from 0:40 onwards).
Thank you for taking a look at my portfolio!