Unity Setup Guide
(last updated September 2021)
Step 1: Installing Unity Hub
Unity Hub is a program for managing Unity projects, installations, and licenses. Once things are setup, you will mainly use it to launch your Unity Projects.
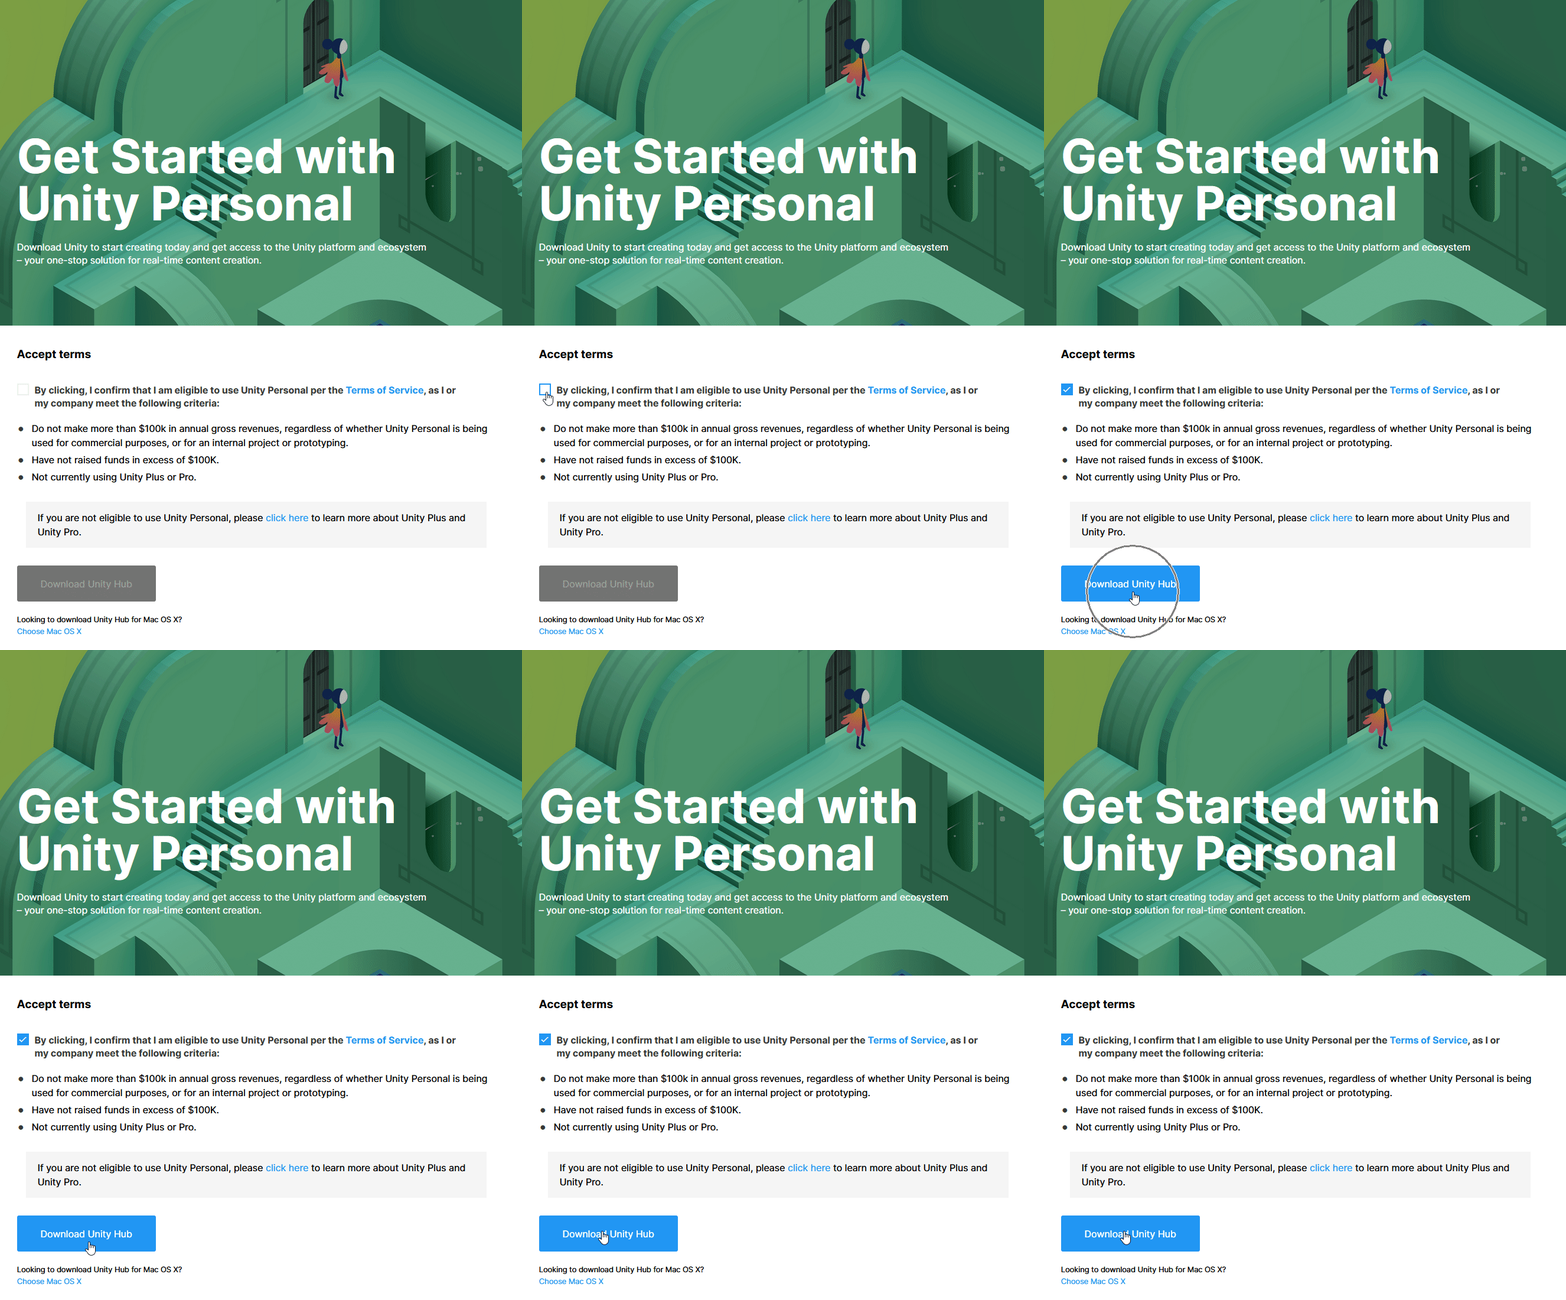
To begin, open up a web browser and go to https://store.unity.com/download?ref=personal. Since we are neither using Unity in a professional capacity nor earning annual revenues in excess of $100k, we can use Unity Personal, which is essentially the same as the Plus/Pro/Enterprise versions but at the much more agreeable cost of $0.
Click the checkbox to confirm your eligibility, and then click Download Unity Hub, as shown in Figure 1:
After the Unity Hub installer has finished downloading, navigate to it in your file explorer and run it to install Unity Hub on your system.
Step 2a: Creating a UnityID
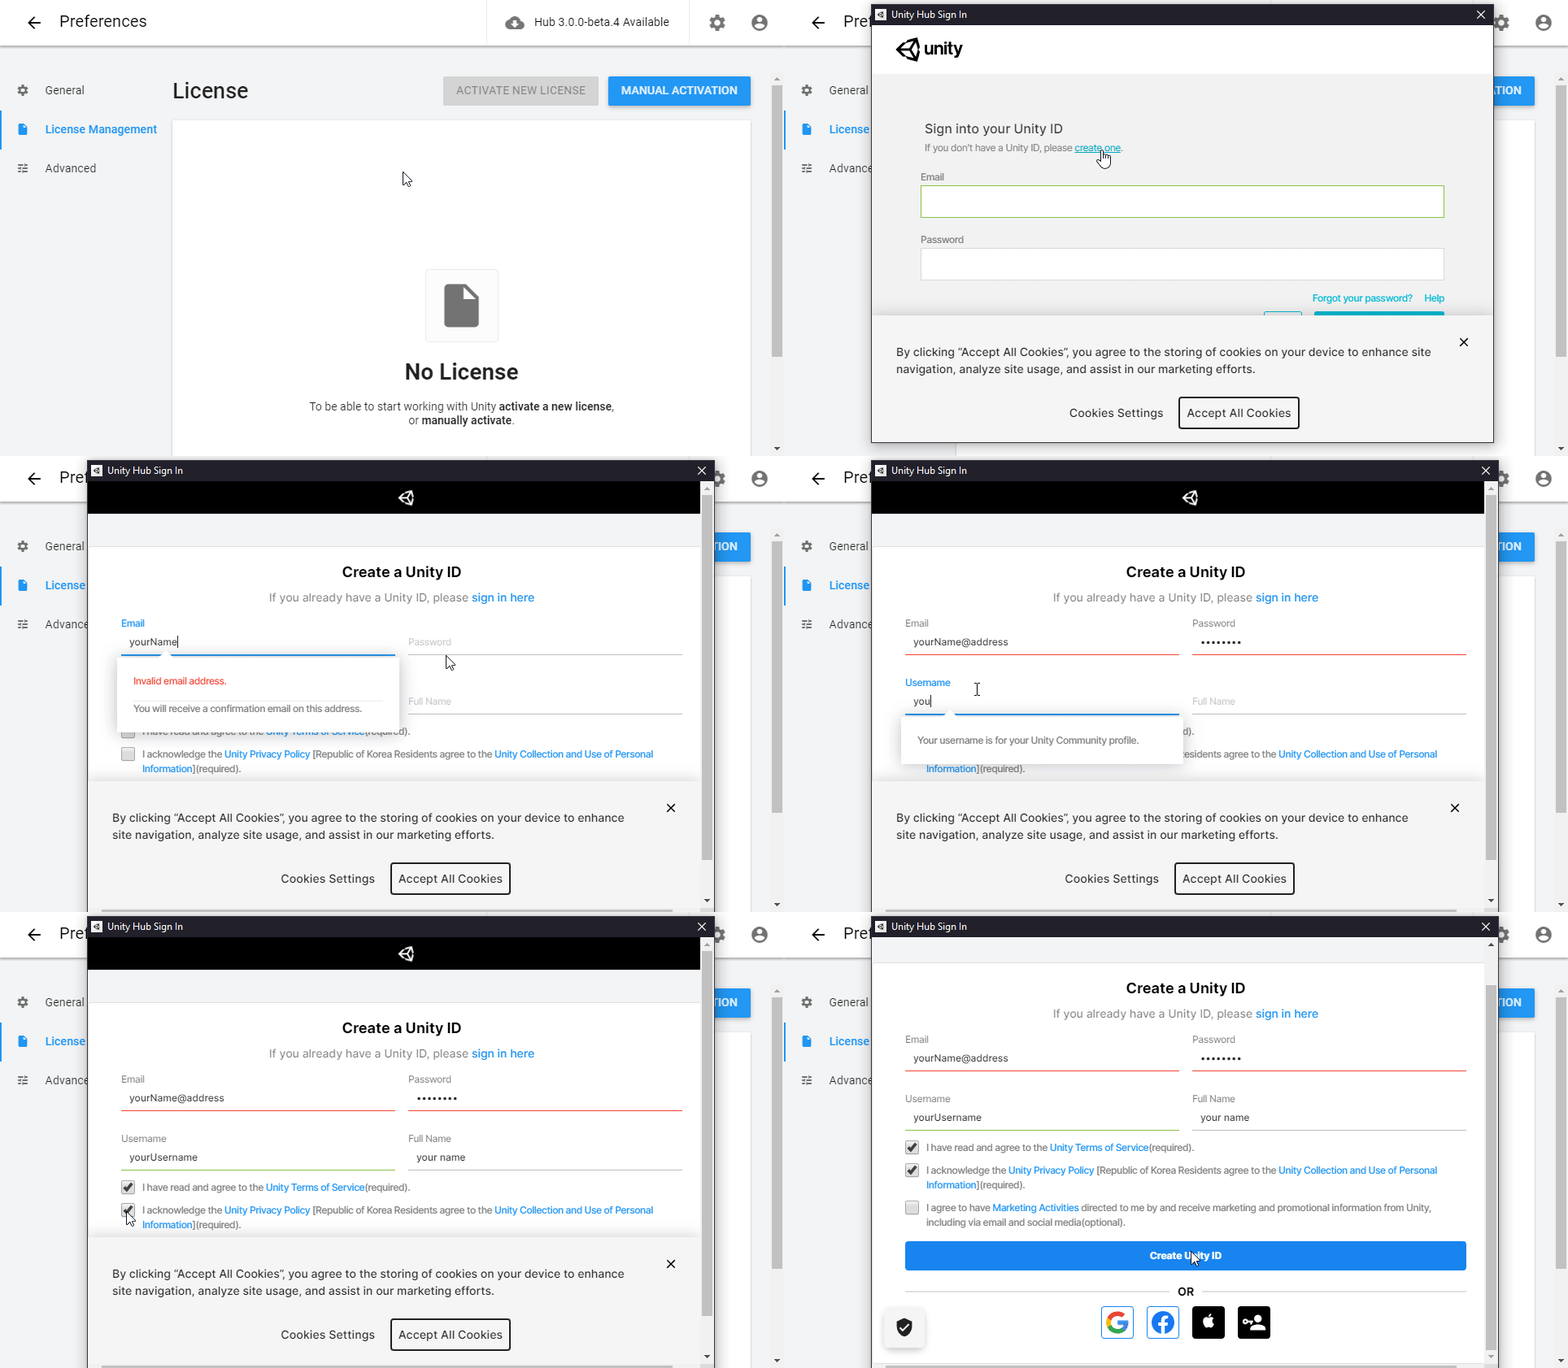
Once installation is finished and Unity Hub launches, it will claim that there is no license. We can solve this by creating a Unity ID and then selecting Activate New License.
To create a new Unity ID, first click the circular icon in the top right corner of the window, select sign in, and click on the highlighted create one text to create a Unity ID, as shown in Figure 2.
Step 2b: Claiming a Personal License
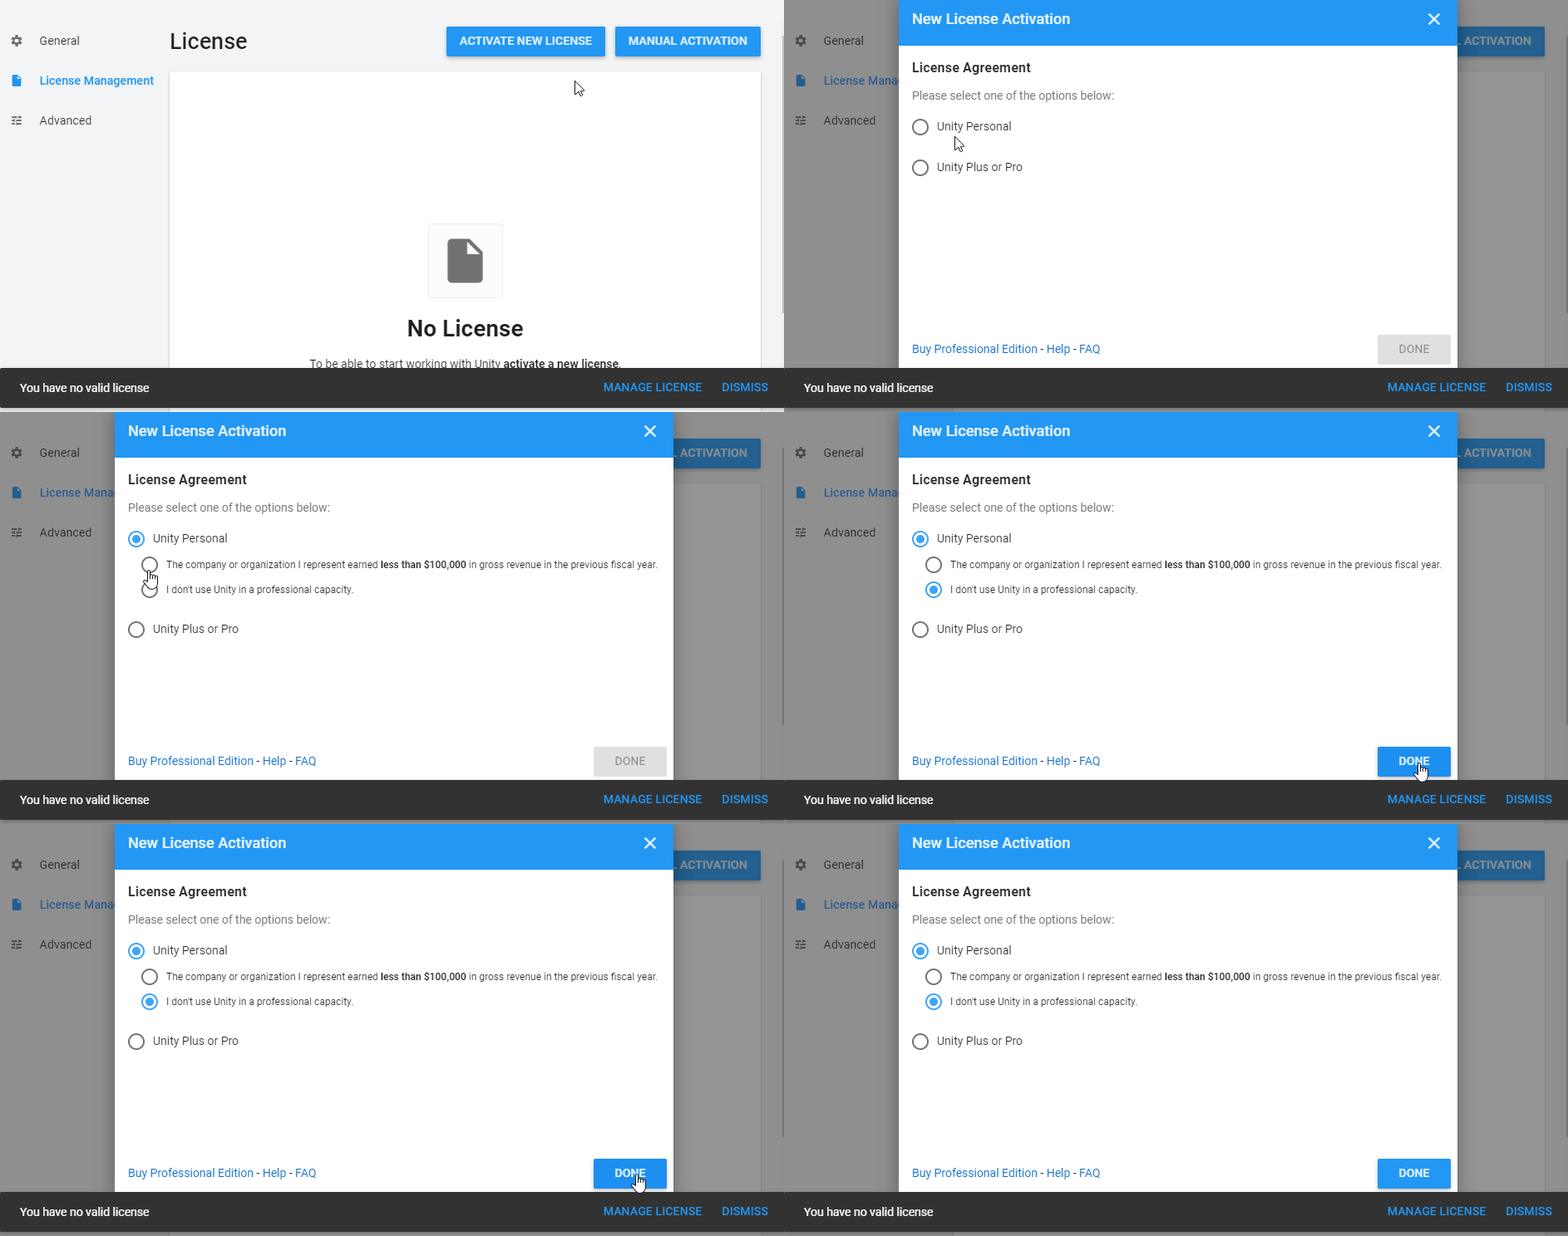
After you have created an account and finished logging in (Note that you might first have to follow an account verification link from Unity, which should be sent to the email address you provided earlier), the next step is to claim your license. Either click on Activate New License and navigate through the prompts on your own, or follow the directions shown in Figure 3.
Step 3: Downloading the Unity Editor
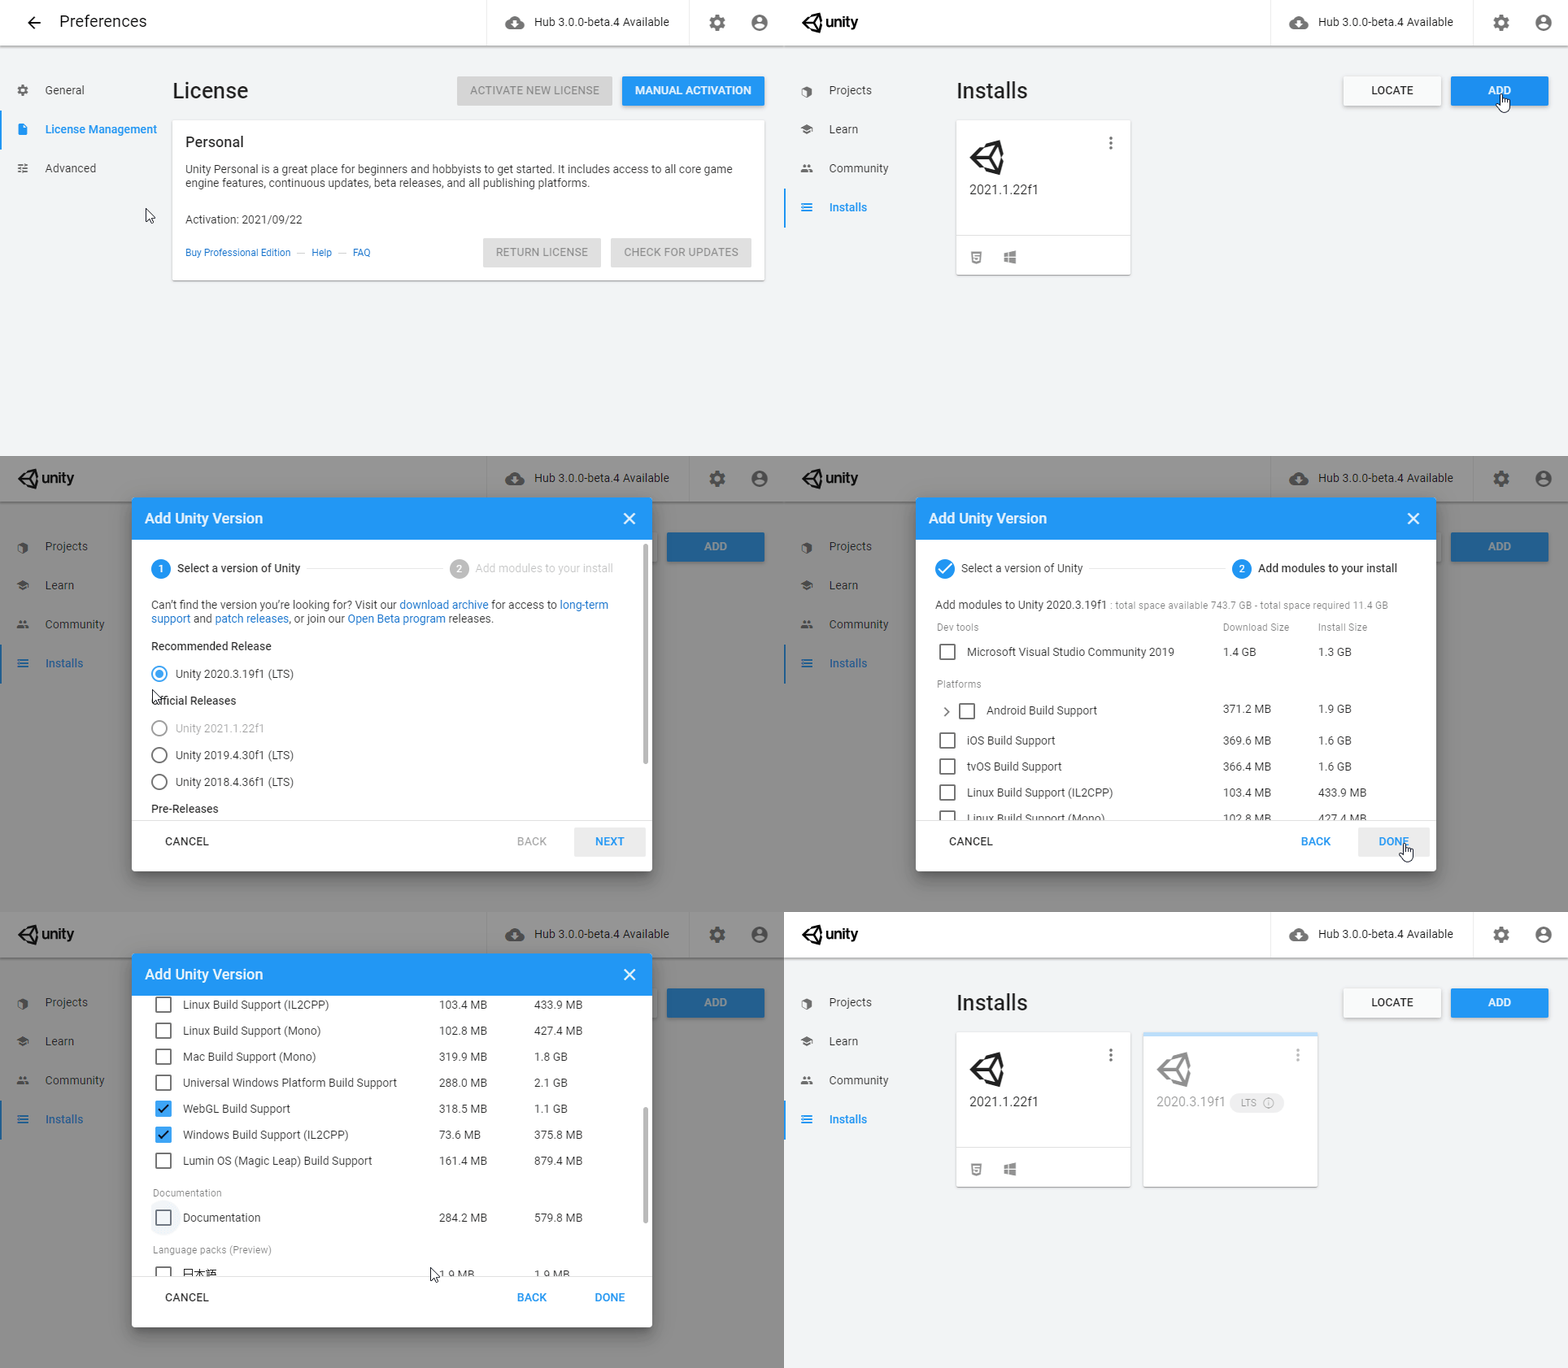
Once you activate your license, you can download a version of the Unity Editor. Navigate to the Installs section of Unity Hub (if you are still in the Preferences menu, you may have to hit the back arrow in the top left portion of the screen). From the Installs section, click the Add Button and choose the version of Unity you would like to download. If you intend to work on a project with multiple people, it is important that each person is using the same version of Unity. Should you wish to do so, there are a variety of additional modules (such as WebGL build support) which you can choose to download with the Unity Editor.
If you require a version of Unity which is not listed in the Add Unity Version dialog, an archive of past releases is available at https://unity3d.com/get-unity/download/archive.
The process of downloading the latest Unity version is shown in Figure 4.
Step 4: Creating a Unity Project
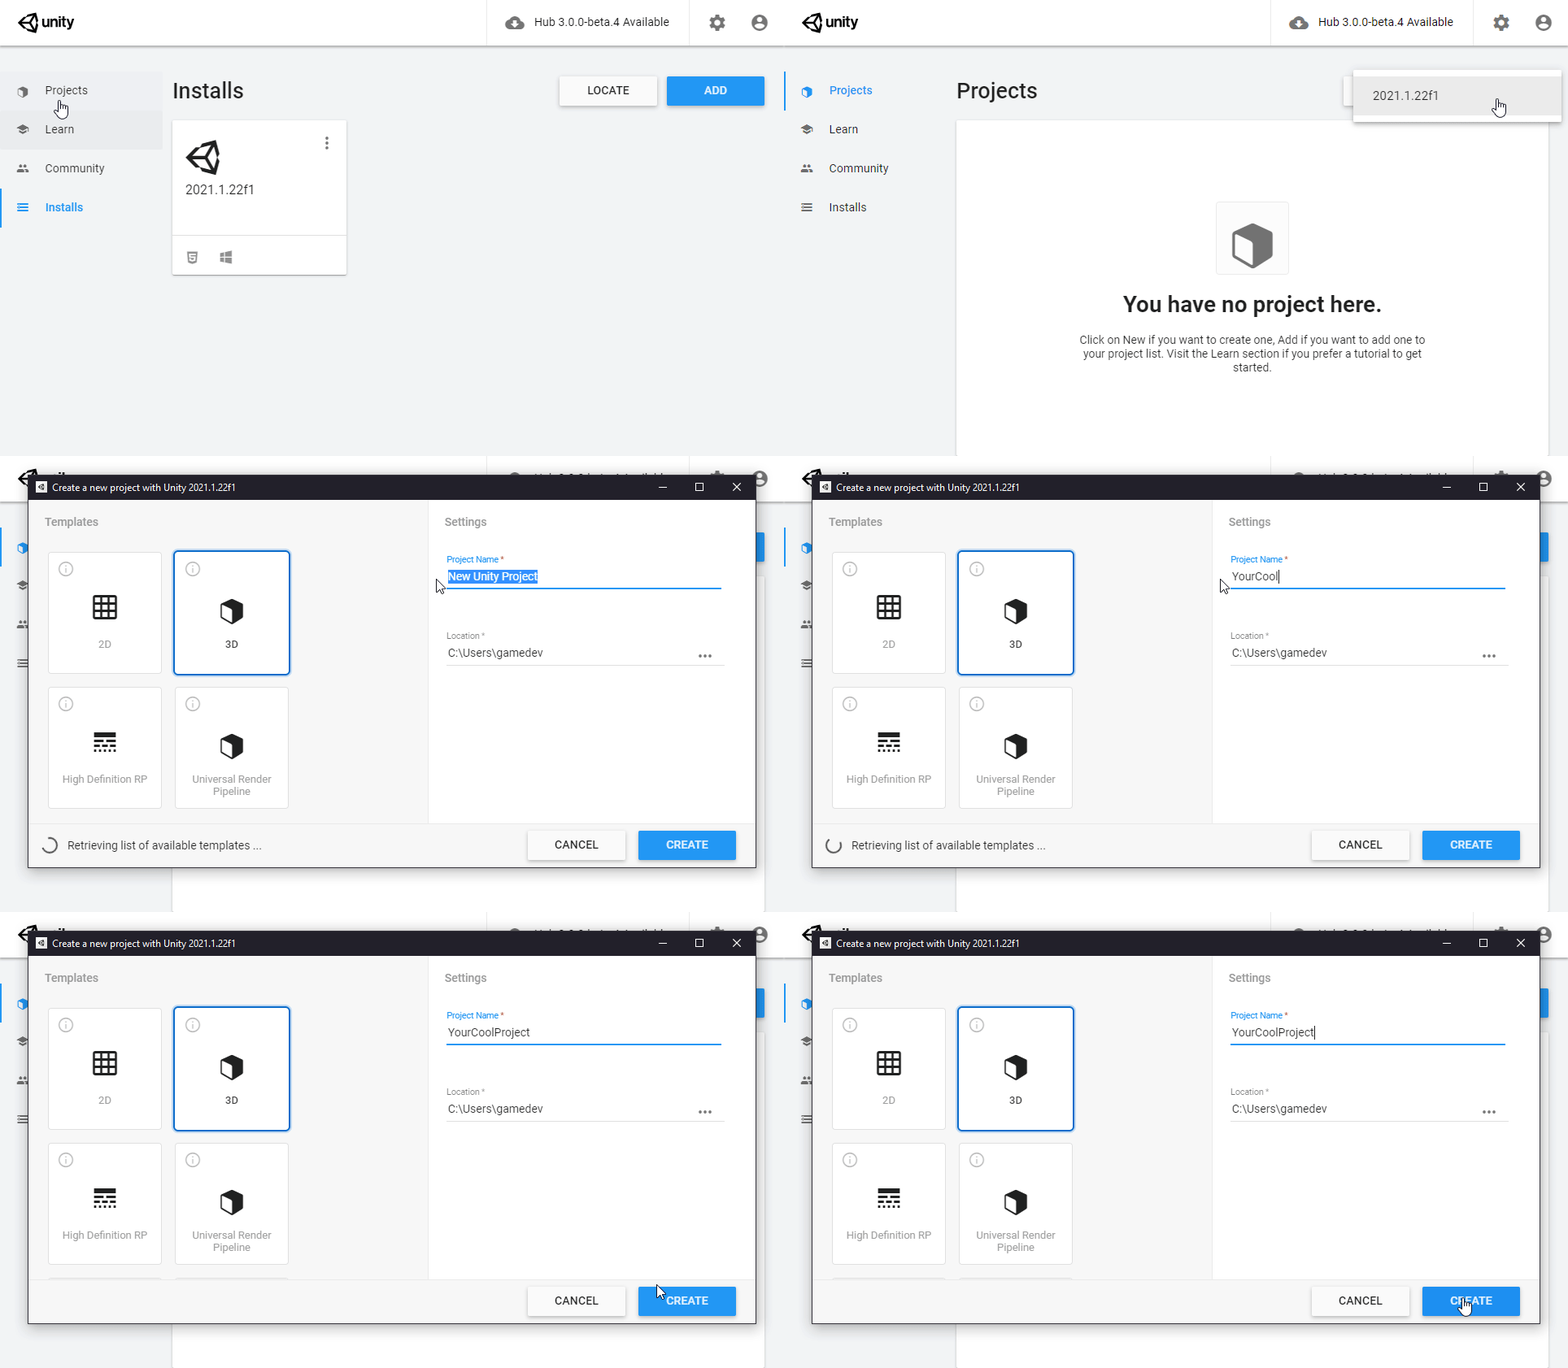
Once your chosen Unity Editor version has finished installing, the final step is to create a new Unity project. In Unity Hub, navigate to the Projects section and then click New to begin creating a new project. By selecting the drop-down arrow beside the New button, you can select which version of Unity your project will use.
When you are happy with the project settings, click Create and Unity will create a new project, eventually opening the project to a blank default scene.
The project creation process is shown in Figure 5.
You should now have Unity installed and a blank project ready to go.
Good luck, and happy developing!
